This software helps with distribution, production and financial activities.
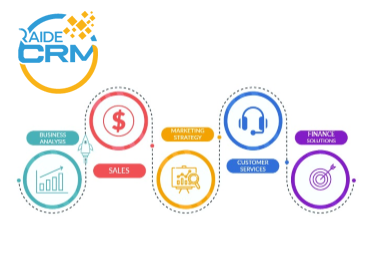
Welcome to raideCRM, Customer Relationship Management software for managing your customer relation in a better way. Enables you to nurture relationships with customer and prospects to sustain long-term profitability and specifically focusing on customer retention and ultimately driving sales growth.
• Admin profile
• Call Logs
• Tasks
• Email
• Notification
• Collapse left menu
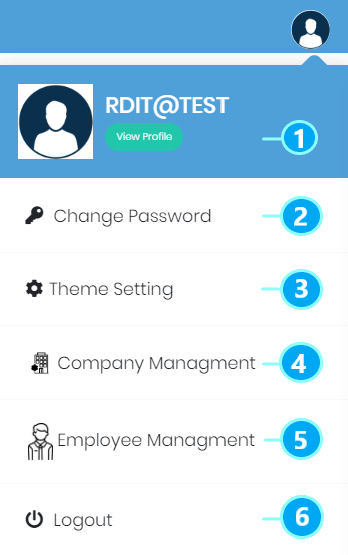
Admin Profile
After getting license, activation of raideCRM is the first step & user can manage all information related to admin profile, set a new password and the company details from this tab. User can add required company & branch information & user can also update the same later of its required.
03
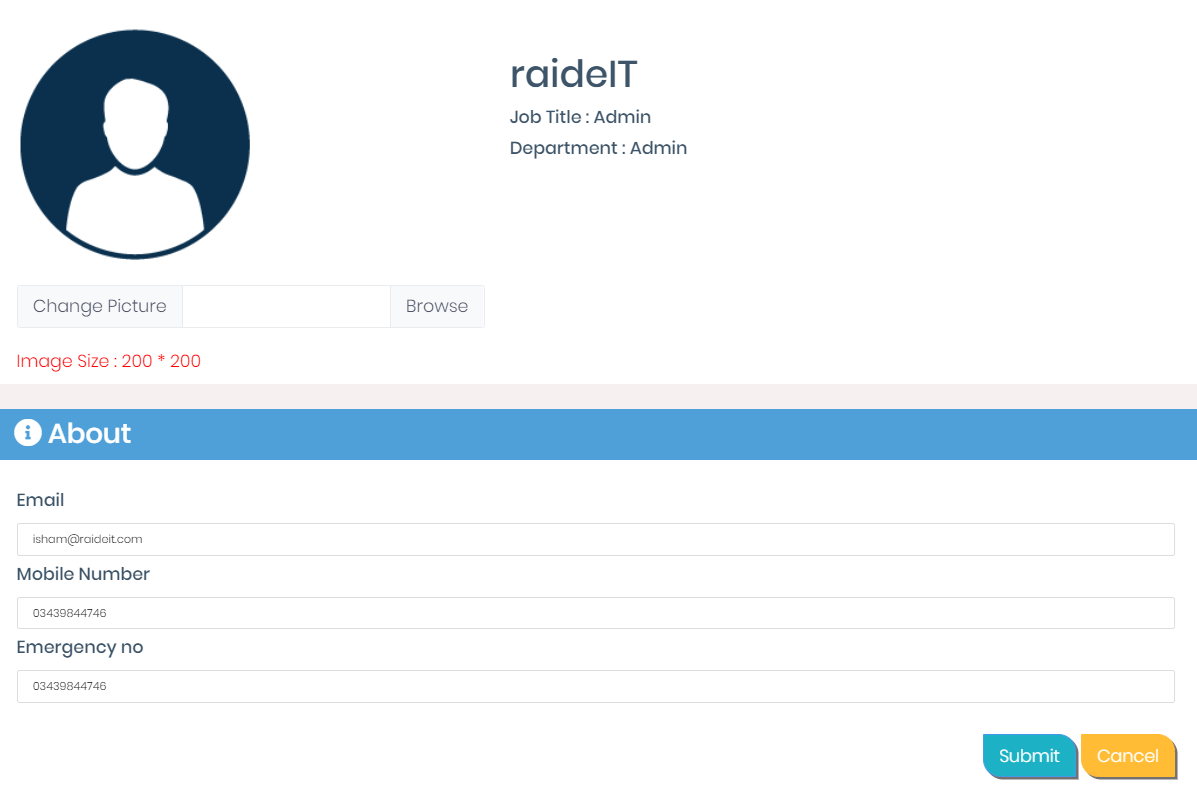
View Profile
In admin view user can update the profile accordingly once user login to the application
04
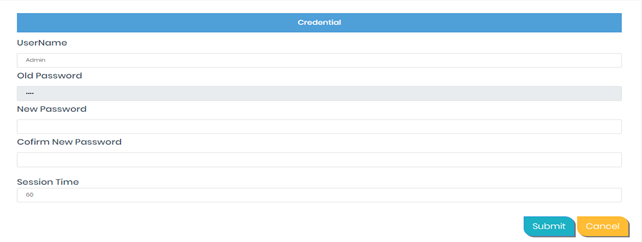
Change Password
User can Change Password from this tab
05
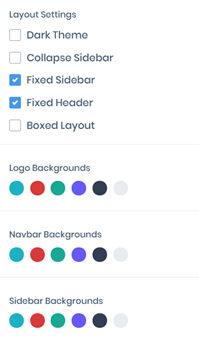
Theme Setting
User can set the application Theme Setting according to the below available choices
06
Company Management
To navigate Company Management
1. Click Company Management
2. Company details will be displayed
3. In Company screen user can click Previous(start) and Next(last) to access the respective list of branches
4. User can update the company details by clicking the Edit icon on right corner where the user can update company details, user can select the company logo for the main page and can also add another logo for reports which will be print on reports, user can specify the document sequence number and can add bank details
5. User can add as many branches by clicking Add Office Branch button to add branch and can also update existing branch if required
07
Employee Management
After setting the company & branches details admin can add employees by clicking Employee Management.
To navigate Employee Management .
1. Click Employee Management
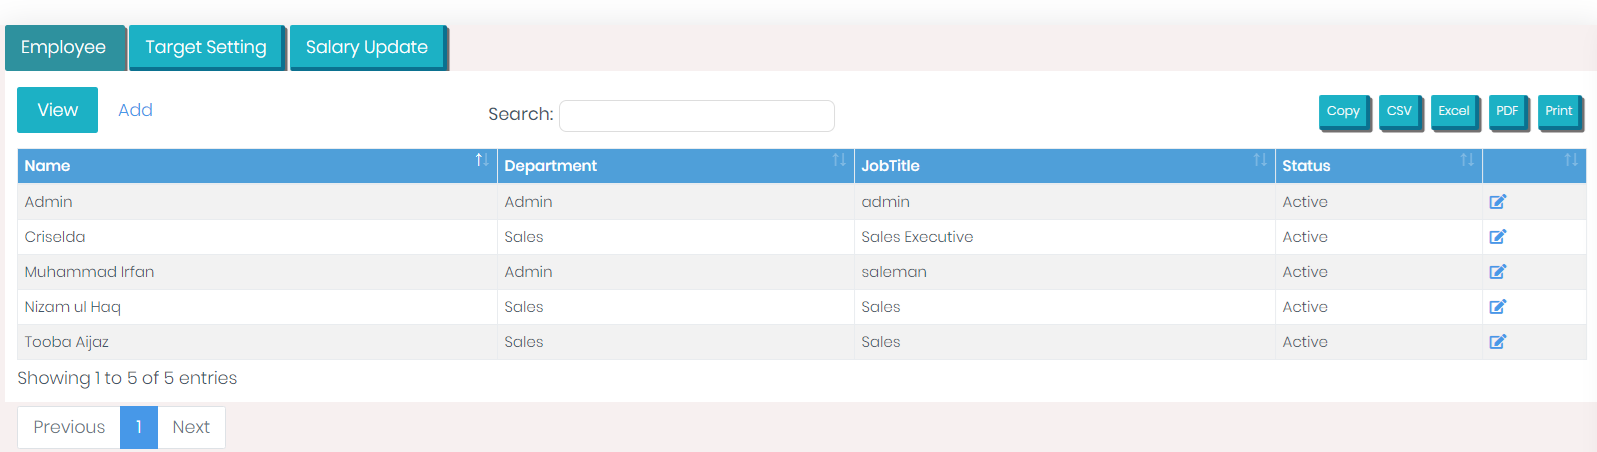
2. Existing list of employees will be displayed and user can add new employee also by clicking add button
3. In Employee screen a user can click Previous(start) and Next(last) to access the respective list of employees
There are three tab in employee management
Employee
4.By clicking employee tab admin can add new employee and can update existing by clicking the Edit icon in right side
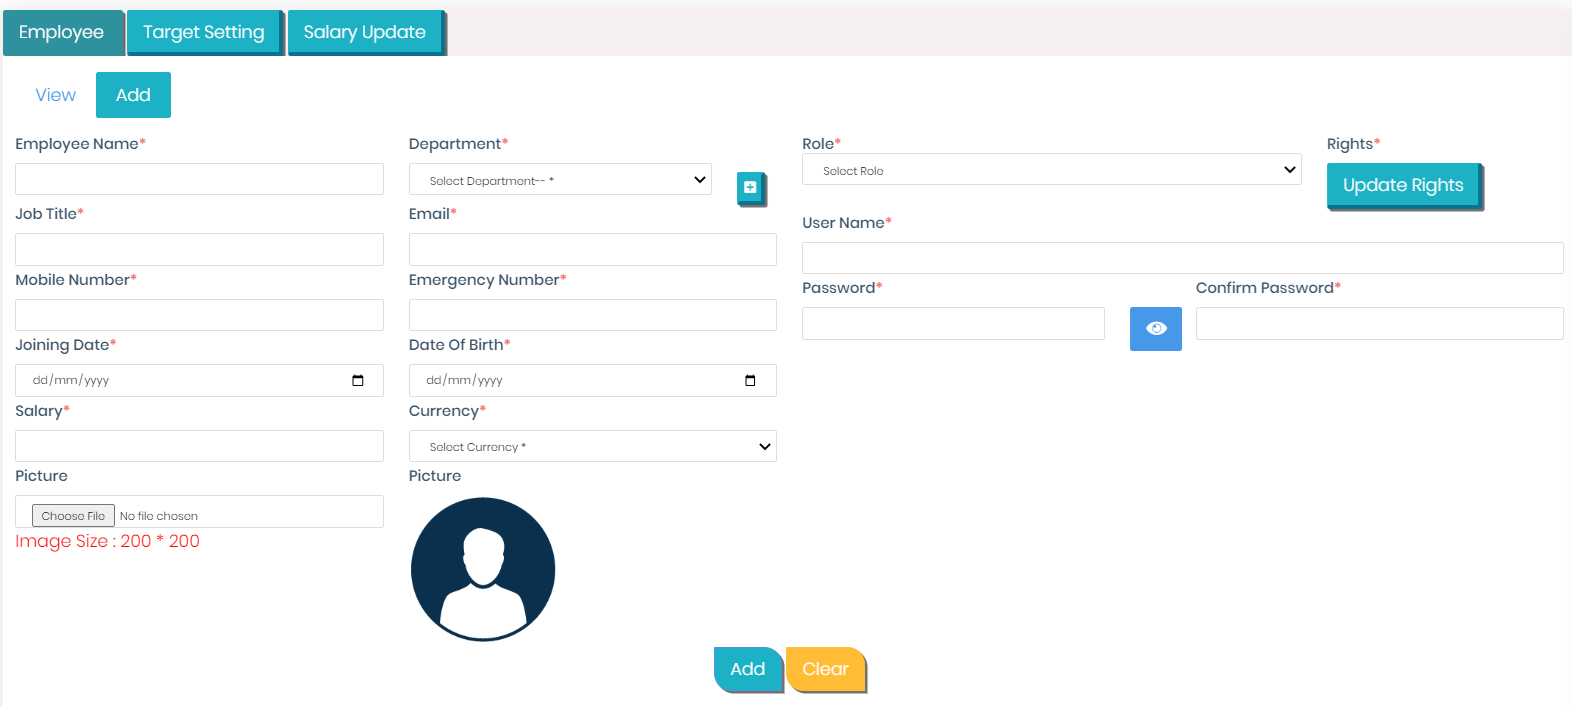
5.By clicking Add button below screen will be displayed & admin can fill all fields accordingly, assign roles and give rights the employee according to their roles.
6. Assigning role and rights to the user, admin can specify the following role by clicking Role dropdown
7. Assigning rights to the user can be done by clicking Update Rights button, the below screen will be displayed where admin will assign rights to the employee by clicking Read, Write and Update checkbox. If none of the checkbox is checked, means that functionality will be disable to employee.
Get Started With raideCRM
Thousands of businesses have chosen raideCRM to power their projects — join the family.